What’s your favorite fair/carnival food? I loved corn dogs. LOVED THEM. While everyone in my family ate delicious barbecued chicken dinners (made by the local volunteer firemen), I held out. I wanted a corn dog. My mother hated this! Chicken was healthy. Corn dogs….weren’t. Since it was once a year, she didn’t argue with me. But, each year she attempted to get me to try the chicken. I never budged. I wanted a corn dog.
Today, of course, I can eat the barbecued chicken. Surprisingly it’s gluten-free. The corn dogs are not. Boo! So I have to make them myself. Over the years, I’ve learned some tips for making the best corn dogs at home.
Use Great Hot Dogs
I’m going to go out on a limb here and guess that the corn dogs I ate at the Washington County Fair weren’t made from the finest of ingredients. I know, I know! That’s a wild guess. 🙂 AnyHOO, you can select whatever hot dogs you like. I usually use Applegate Farms hot dogs. And if you have a local producer that makes good hot dogs, use those.
Dry the dogs.
Before coating the hot dogs, dry them. It doesn’t matter if you use natural casing dogs or gluten-free veggie dogs, they need to be dry. Remove them from the refrigerator, allow them to come to room temperature and then roll them in a towel to dry. Remember to dry the ends.
Coat them in flour.
While researching how to make corn dogs at home, I noticed one compliant coming up again and again: the batter slides off the dog. To keep the batter on the hot dogs, roll them in white rice flour before coating with the cornmeal batter. Again, remember to coat the ends.
Use a tall glass.
Evenly coating the corn dogs with batter can be the toughest part of making corn dogs. To make it easy, fill a tall drinking glass with batter and dip the dogs, one at a time, in the cup.
Work quickly.
While the white rice flour helps the batter to adhere to the hot dog, some batter still drips off the dog after coating. Set your batter-filled drinking class next to your deep fryer or heavy-bottomed pot. Dip the dog in batter, taking care to cover the end of the dog that meets the stick. Lift the dog out of the batter, allow it to “drip” for a second, swirling or shaking it lightly and place it right into the deep fryer. Remember, don’t drop the corn dog into the fryer. Lay it in the fryer gently, tip first. This helps to prevent splattering.
Wrap the stick after frying.
When I fried my first corn dog, I got excited! It was so pretty and corn dog-y. After allowing it to drain for a second or two on a paper towel-lined plate, I picked it up. And…I dropped it down. That stick was HOT. Before serving, wrap the stick in a paper-towel.
Enjoy!
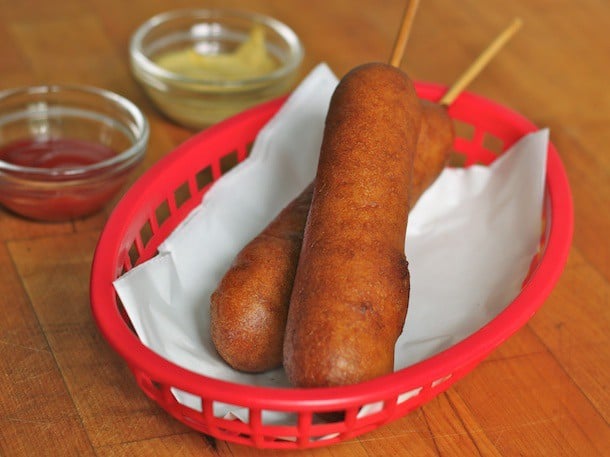
Making homemade corn dogs isn’t as easy as stepping up to a booth and buying one but the work is worth it. These are some seriously good corn dogs!
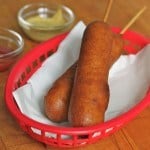
Gluten-Free Corn Dogs
Ingredients
- 1 1/4 cups gluten-free cornflour (finely ground cornmeal) (6 1/4 ounces; 178 grams)
- 3/4 cup white rice flour, plus additional for coating hot dogs (3 ounces; 85 grams)
- 2 teaspoons baking powder
- 1/2 teaspoon salt
- 1/4 teaspoon xanthan gum
- 1 cup milk (8 ounces; 226 grams)
- 2 large eggs (about 3 1/2 ounces; 100 grams)
- 3 tablespoons honey (2 1/4 ounces; 65 grams)
- 2 tablespoons vegetable oil (3/4 ounce; 22 grams)
- 8 gluten-free hot dogs
- 8 skewers, about 6-inches long
- Vegetable Oil for frying
Instructions
-
In small bowl, whisk together gluten-free cornflour, 3/4 cup white rice flour, baking powder, salt, and xanthan gum. Add milk, eggs, honey, and 2 tablespoons vegetable oil. Mix together until smooth. Allow batter to stand for ten minutes.
-
Fill a large heavy pot, Dutch oven, or deep fryer with enough oil to submerge hot dogs. Heat oil until a deep-fry thermometer reaches 365 degrees.
-
Dry hot dogs with a paper towel, including ends, and slide sticks into hot dogs. You want to slide sticks about halfway into the hot dog. Dry hot dogs with a paper towel. Don't forget the ends! Roll hot dogs, one at a time, in white rice flour. Place hot dogs on dry plate. Set aside.
-
Line a plate or baking pan with a few paper towels. Place near the fryer. (Be sure plate is a safe distance from the fryer.)
-
Select a glass that's tall enough to dip the entire hot dog into. Pour batter into drinking glass. Dip hot dogs, one at a time, into glass. Lift hot dog from batter and swirl lightly. Quickly transfer coated hot dog into the hot oil, gently placing the hot dog into the oil. Fry one or two corn dogs at a time. After about one minute of frying, gently "roll" the corn dog in the oil using a pair of metal tongs. (Often they roll themselves.) Remove corn dogs from oil. Drain on paper towel lined plate and serve. Wrap the stick in a paper towel before serving.
-
Corn Fritters
-
Drop leftover batter, about two teaspoons each, into the oil and cook until golden brown. Remove from oil with a metal skimmer.
Lisa says
Thank you for this recipe! I just had authentic corn dogs for the first time in 25 years! yippee…
Elizabeth says
Yay! Glad you enjoyed it!
Loretta says
Absolutely awesome! Will become a staple recipe in my kitchen. Don’t change a thing in this recipe! Fabulous! Thank you for providing us with a treat we haven’t had since we stopped eating gluten 4 years ago!
Elizabeth says
Glad you enjoyed them!
Mandy says
Do you fry the stick in the oil?
Elizabeth says
Yes. The stick will be hot when removed from the fryer. I wrap it in a paper towel before serving.
Holly says
Elizabeth, can these be frozen after frying then cooling (of course)?
Also do you re-use your frying oil? I’m going to use Palm Shortening I hope that’s okay here.
Thank you!
Holly says
Hi Elizabeth, not sure if you received my comment above from last week. I remember last time you said my comment went into the spam folder. Hoping you get this! Thanks