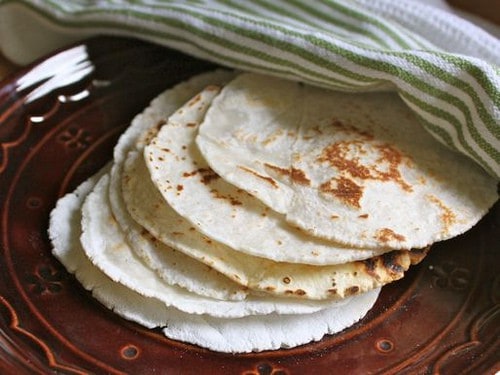
I’m so excited about this one! Finally, gluten-free flour tortillas!
Really, I don’t need to tell you why flour tortillas are awesome. You either love ’em or you don’t. Me? I’m in the love camp. So it thrilled me (thrilled, thrilled, THRILLED me) when this recipe finally came together.
This recipe makes a chewy, flexible wrap. Ready to begin?
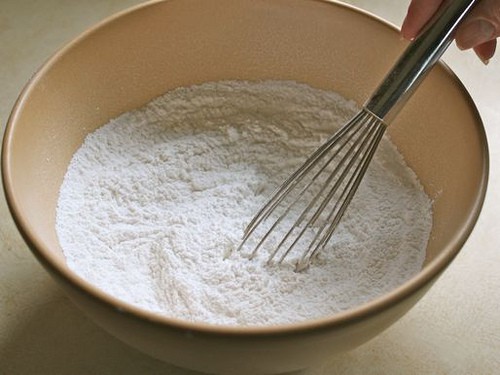
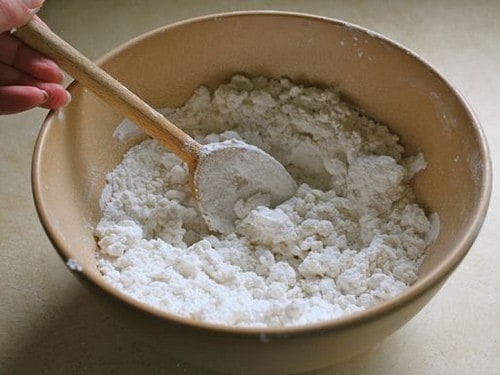
In a medium bowl, whisk together the dry ingredients. Be sure to select a bowl with an opening large enough to reach into. This is important.
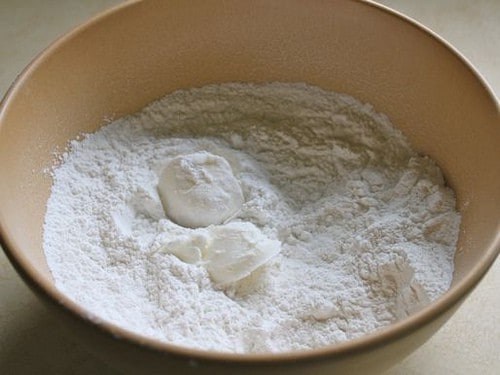
Add shortening or lard. While this recipe is gluten-free, dairy-free, egg-free, and nut-free, it isn’t fat-free. And that’s a good thing! The fat adds a pleasant flavor and texture to the wraps. Don’t skip it!
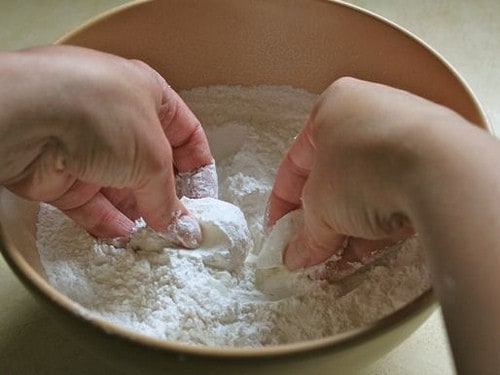
It’s best to do this recipe by hand. Reach right into the bowl and work the shortening into the flour with your hands. A snapping motion of your fingers accomplishes this task quickly. You don’t want any large pieces of shortening to remaining.

Add the water. At first, just half a cup cold water. Stir it into the flour mixture.
The flour mixture will be dry. VERY dry. This is normal.
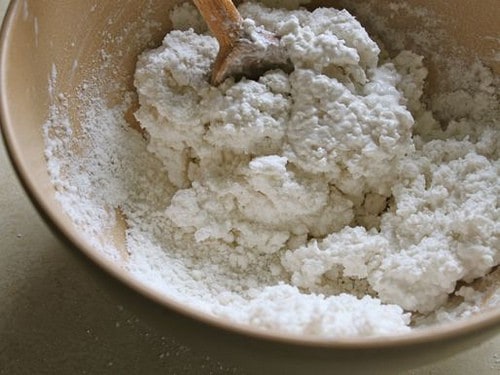
Add 1/4 cup additional water. Stir. If the dough just begins to hold together, stop adding water! If the dough remains dry, add another tablespoon or two of water.
You want to add the water slowly. If this dough gets too wet, it’s impossible to work with. Don’t let that scare you! Just be cautious when adding the water and the dough will be fine.
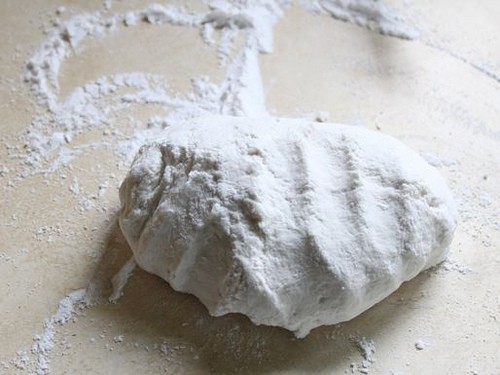
Generously white rice flour your counter. Turn the dough and any dry ingredients that are clinging to the bottom of the bowl onto the counter. Dust your hands with flour and begin to knead the dough.
You want the dough to be smooth. If at any point during kneading the dough is wet, knead in more flour. If the dough doesn’t come together, add a splash more water. During this step you really want to feel the dough. The texture you’re looking for is similar to play-doh: damp but not wet.
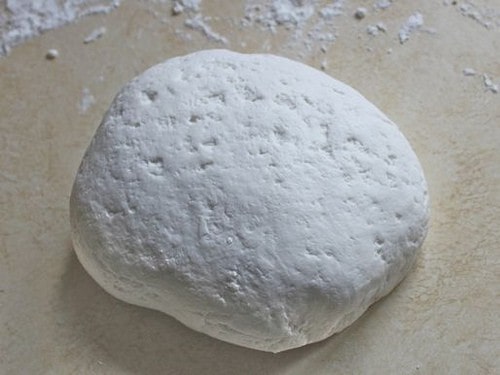
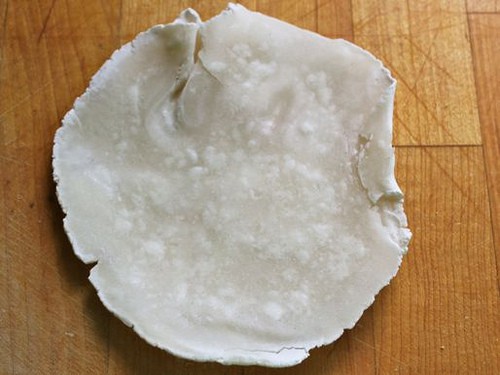
Once you think you’ve got it, pinch off a piece of the dough. Roll it between your palms. It should be easy to handle. You don’t want the dough to stick to your hands or fall apart. Again, think clay or play-doh.
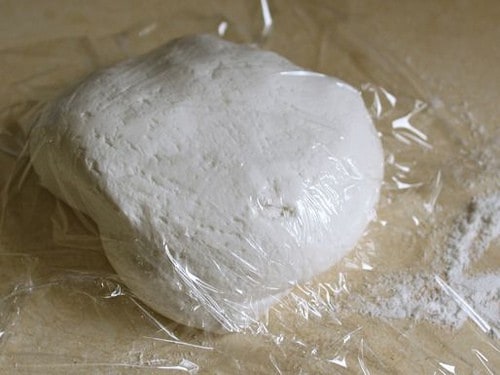
Cover the dough with plastic wrap. This prevents a skin from forming.
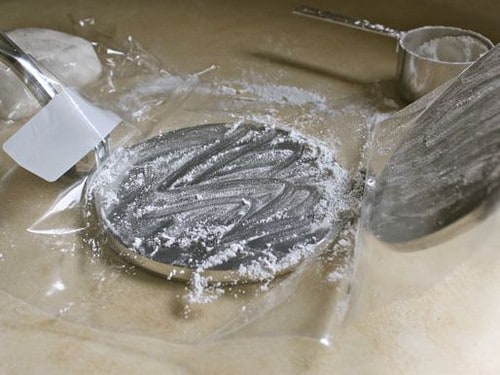
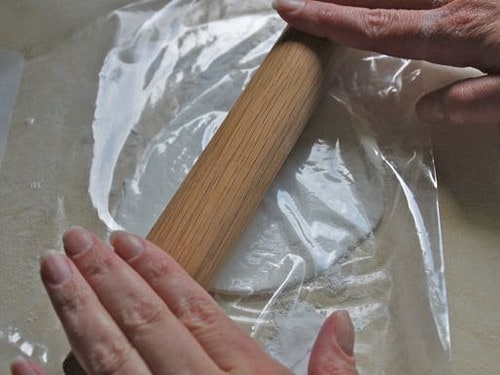
Cut open a plastic bag and place it on a tortilla press. Dust the bag with flour. Don’t skip this or the tortilla will stick to the plastic.
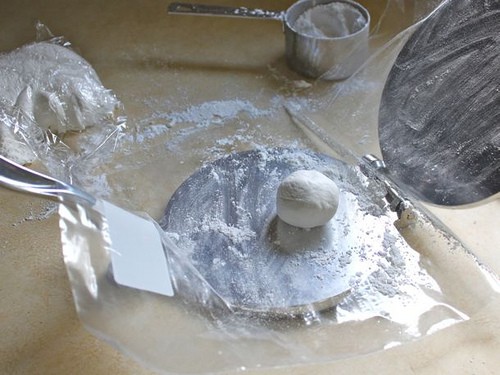
Pinch dough, you want about two tablespoons, and roll into a ball. The dough should not stick to your hands. Place dough into tortilla press. It’s a good idea to place the dough ball closer to the hinge than right in the center. Then simply close the press. The dough flattens under the pressure.
Don’t have a tortilla press? They are worth the investment. But, until you get one, you can make this recipe. Simply slip the dough ball between two pieces of floured parchment paper. Then use a heavy skillet and “squish” down the dough ball.
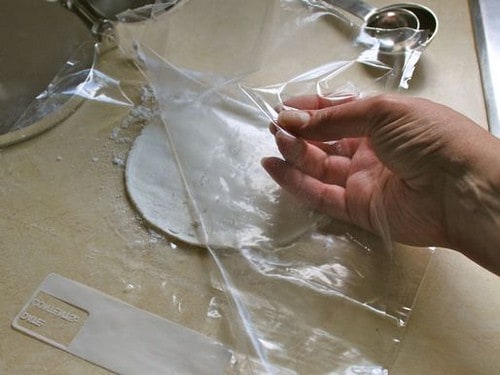
Slide the tortilla–still in the bag– off the press. Gently pull the plastic bag off the tortilla. Go slow. If the dough rips, don’t worry. You can re-roll the dough.
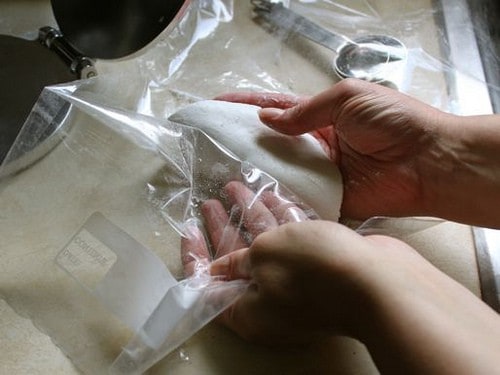
Hold the tortilla in your hand. Pull away the bag. You don’t want to pull the tortilla or it could rip.
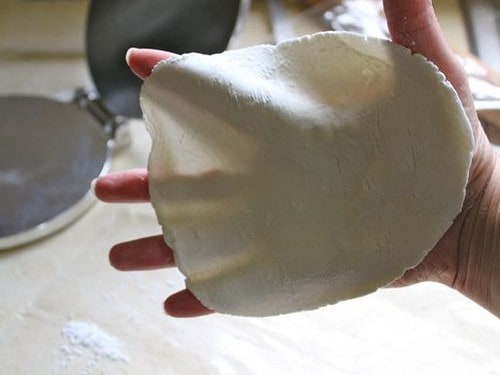
Hold the tortilla in your hand. Pull away the bag. You don’t want to pull the tortilla or it could rip.
If your tortilla isn’t as thin as you’d like, re-flour your bag and return the tortilla to the bag. Gently roll out the tortilla.
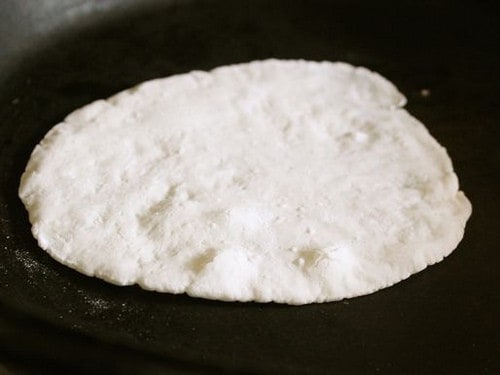
Heat your cast iron skillet until it smokes lightly. Add the tortilla. Cook the first side for about three minutes.
Flip! The second side doesn’t cook as long nor will it get as dark.
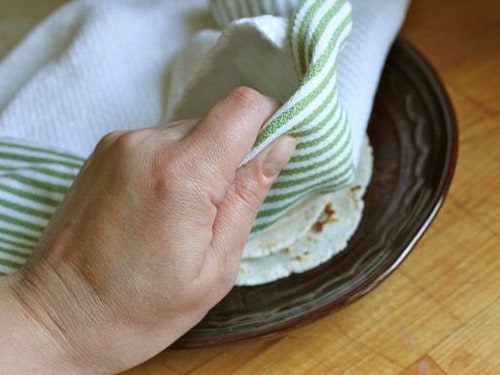
As soon as the tortilla comes out of the pan, place it on a plate under a clean, dry towel. Cover. The steam will soften the tortilla. This is a good thing.
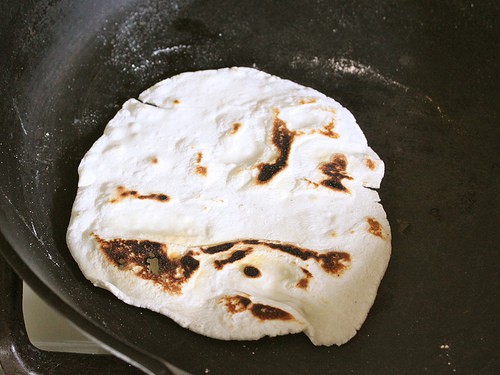
The tortilla shown in the pan above is just a wee bit dark. That’s ok! Adjusting the heat takes some practice. The tortilla above, however, is pretty perfect.
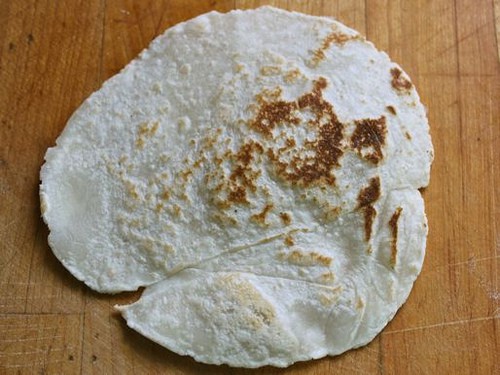
Same tortilla. Different side. As you can see, the second side isn’t as dark. If we cook the second side too much, the tortilla might tip into the “too crisp” stage. At that point, even placing the tortilla under a towel to steam for a minute won’t soften it.

Here’s what you want to avoid. Learn from my mistake! The pan was too hot when I put the tortilla in it. The resulting tortilla almost burnt. If you get a tortilla or two like this, reduce both the heat under the pan and your cooking time.
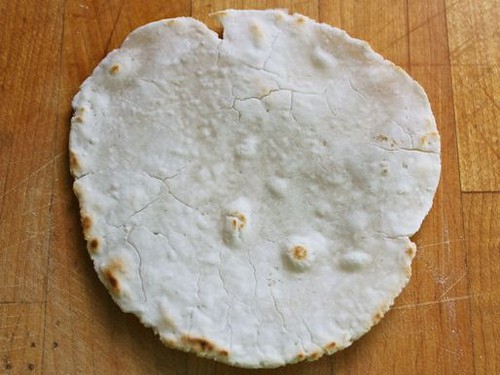
And here the pan was too cold. The tortilla did cook but it’s anemic. If your tortilla looks like this, increase the heat under the pan.
If you are new to making tortillas, you might have a few that aren’t “just right.” That’s ok. (Well, it’s a bummer in the moment.) With practice, you’ll get the hang of it. In fact, try making a “play” batch first. You don’t want a wonderful meal waiting for your first batch of homemade flour tortillas.
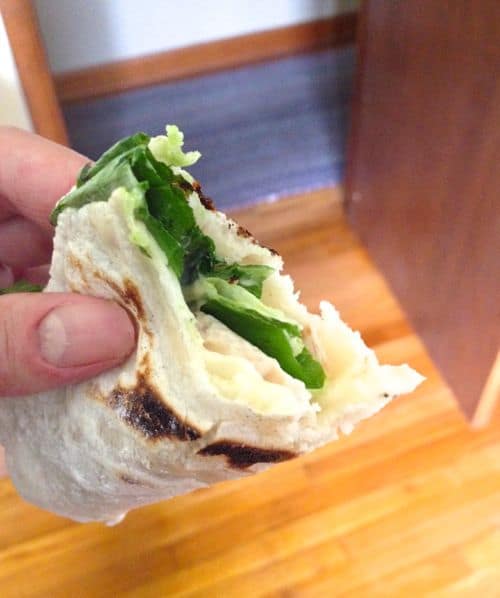
If you make a play batch, you could throw in, say, some lettuce, turkey, and lettuce. And you will LOVE it. I promise.
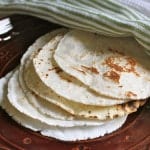
Or you could just stare at the plate of tortillas you made and beam with pride. That’s a good option too!
How to Make Gluten-Free Flour Tortillas
Ingredients
- 1 1/2 cups white rice flour (6 ounces; 170 grams)
- 1/2 cup tapioca starch (2 ounces; 57 grams)
- 1 teaspoon xanthan gum
- 1/2 teaspoon baking powder
- 1/2 teaspoon salt
- 2 tablespoons shortening or lard (1 ounce; 28 grams)
- 3/4 cup ice water, plus more as needed (6 ounces; 170 grams)
Instructions
-
In medium bowl, whisk together white rice flour, tapioca starch, baking powder, xanthan gum, and salt.
-
Using your hands, cut in the shortening. Do this by using a snapping-like motion with your fingers. No large pieces of shortening or lard should remain.
-
Add 1/2 cup cold water. Stir with a wooden spoon. Dough will be dry. Add another 1/4 cup water. Stir. Feel the dough. If it starts to hold together and feels damp, stop adding water. If the dough feels dry, add another two tablespoons water. Repeat until dough is moist but not wet.
-
Generously white rice flour your countertop. Turn dough out onto counter. Flour your hands lightly with white rice flour. Gather dough into a ball. Knead the dough until smooth. If the dough is too wet, knead additional white rice flour into it; if the dough feels dry, knead a splash more water into it. You want the dough to be easy to work with. Pull off a little. Roll it between your palms. It should not stick or fall apart. The dough's texture should be similar to clay or play-doh.
-
Cover dough with plastic wrap. This prevents a skin from forming.
-
Heat 10-inch cast iron skillet (non-stick pans don't work well. They don't get hot enough.) over medium heat. While skillet heats, line a tortilla press with a cut open plastic bag. (Only cut open the bag on two sides. The "hinge" of the bag should line up with the hinge of the press.) Dust the bag with white rice flour. Pinch off a dough ball, about two tablespoons. Roll dough into a ball.
-
Place the dough ball into the press and close to flatten. Slide the bag off the tortilla press. Gently pull the bag away from the tortilla. Lift the tortilla into your hand. Pull away the second piece of plastic. If the tortilla seems thick (which doesn't happen too often), dust the bag with flour, return the tortilla to the bag. Dust the top of the tortilla, cover, and roll out a little.
-
Increase the heat under the skillet to medium-high if the skillet isn't smoking lightly. Place the tortilla into the skillet. Cook, about three minutes, until the tortilla is golden brown.(As your first tortilla cooks, begin pressing out the next tortilla.) Flip. Cook an additional minute. Remove and place hot tortilla onto a plate. Cover with a clean, dry towel.
-
Repeat. Tortillas are best enjoyed right away. You can store them overnight in a sealed bag. Reheat by placing into a warm skillet.
Carla Greenfeather says
Can hardly wait to try this. I’m not real thrilled with my current GF tortilla recipe. We lived in Houston for 15 years and I miss the fresh tortillas at HEB grocery so much.
PS. I like to use cut open (gf) cereal bags on my tortilla press.
Elizabeth says
I hope you enjoy!Great idea on the cereal bags. I never would have thought of that!
Nelly says
These were awesome! My super picky children loved them as well!!! I was thinking of using this dough to make empanadas. Any thoughts?
Elizabeth says
I’m so glad you enjoyed the tortillas! Empanada dough tends to contain more fat than this recipe. So I don’t think it would give you the result you want. That said, I just put empanadas on my to-do list. I’ll update you soon! 🙂
Sooz says
I made these yesterday and they were okay, I don’t use vegetable shorting because ours is made with palm oil and I don’t eat that so I used coconut oil, when you first make them they have strange smell, but tasted alright, I kept them under a dish towel to keep warm, when I went to heat them up for my husband they were like stiff cardboard and didn’t taste good at all. Maybe I’ll try using different flour like soya or something, they need to be softer in texture and stay fresh longer….like a regular flour tortilla. I feel this recipe needs to be tweaked a lot.
Elizabeth says
Hi! Sorry this recipe didn’t work for you. Using coconut oil instead of vegetable shortening would have radically changed the finished product. Coconut oil is a very brittle oil compared to vegetable oil. As for the strange smell, perhaps one of your flours was rancid? That’s the only thing that would account for that.
Andy says
I just tried making tortillas with all purpose gluten free flour. I used coconut oil as well. Total fail. It’s definitely the coconut oil that makes it smell funny and turns it into cardboard. I didn’t use this recipe, but I will next time. I’m needing a soy, gluten, dairy free tortilla for my neice. I’ll be using lard. Besides my Mexican mother used lard to make her tortillas when I was a kid and they were awesome. Definitely not a fat free food 😉
Elizabeth says
@Andy
Yes! Tortillas should not be fat free! Lard makes a fabulous tortilla. Like, FAB-U-LOUS! Have fun with the recipe when you give it a try. 🙂
Jenny says
If you’re going to rate a recipe, then you have to rate the ORIGINAL product.
By adding very different ingredients that would give you very different results, you aren’t making the original recipe, forgoing your right to leave a rating.
I wouldn’t put coconut flour in place of regular flour then complain about texture and taste of the the original recipe, which would have worked well if it weren’t for my modifications.
That’s just common sense.
Vegetable shortening and coconut oil are very different things. The fact that your recipe was a fail has nothing to do with the original recipe.
I give your review one star for being inaccurate to reality.
Wen says
Elizabeth – thank you so much for the recipe and your very detailed instructions. It’s likely annoying to have people modify your recipes, but I had no lard or shortening so substituted canola oil. They were tasty and flexible, but not quite as pretty as yours :). Was afraid of using too much water and might have needed a touch more and I’ll have to make this a couple of times to perfect the temperature.
Do you think they would work well with brown rice flour?
Thank you again!
Elizabeth says
Glad to hear they worked with canola oil! Brown rice flour will work in this recipe. I’ve noticed that brown rice flour requires a splash more water than white rice flour. So add the water called for in the recipe and adjust as needed. (And enjoy!) 🙂
Terry says
Can I use your recipe with Pillsbury gluten free multi purpose flour blend? I have been looking for a gluten free tortilla or wrap recipe and I am excited to try this.
Elizabeth says
@Terry–I haven’t tested this with a flour blend. They all vary greatly. That said, it might work. 🙂 If you notice it’s dry, add a little more water. Let me know how it goes!
Mardi says
Can I make ahead of time, and store maybe between parchment paper sheets in Large Freezer Baggie, then thaw/microwave when needed.
Elizabeth says
Yes! These freeze very well for up to two months.
Linda says
Do you freeze them before you cook them or after?
Elizabeth says
I’d freeze them after they’ve been cooked and cooled. Wrap tightly and freeze for about a month or so. Hope this helps!
Jasmine says
THANK YOU SO MUCH! Finally a wheat-free tortilla that works and is delicious!
Elizabeth says
Yay! Glad you enjoyed it!
Carrie says
Hi, this sounds really good. Would it be possible to substitute butter for the lard? Thanks.
Elizabeth says
Yes! The texture might be a little different but it will work. Vegetable shorting also makes great tortillas! Have fun!
Phoebe says
Hello! I was wondering if I could just use normal gluten free flour instead of using the white rice flour and the tapioca starch? I can’t get those two ingredients from where I’m from (they don’t sell things like that and I don’t know why). Would it still be the same if I used gluten free flour?
Elizabeth says
All gluten-free flour blends behave differently in recipes due to the differences in ingredients. So I can’t say 100% if the blend would work in this recipe. If you give it a try, let us know how it worked! 🙂
Sarah says
I’ve recently started an anti inflammatory diet, and in making substitutions for gluten, I discovered I have a tapioca allergy. It ranges from a severe reaction like threat swelling and lip swelling to hives, so I’ve just cut it out completely. This is really unfortunate since many recipes I find use tapioca flour, starch, syrup, etc. do you have any suggestions for substitutions? Like in this recipe, would corn starch be a suitable substitute?
Any help is greatly appreciated! 🙂
Elizabeth says
Hi Sarah!
Sorry to hear about your allergy. That’s a tough one! Tapioca is a very elastic starch; so it’s hard to swap it with a different starch and get the same result.
My gut reaction is that corn starch would not work in this recipe. That said, I haven’t tried it. Perhaps give it a whirl if you’re up for a little experimenting?
Good luck!
SARAH says
Thank you for the reply! I will try it out.
Thanks!
Michelle G says
Hi Sarah,
There are other options that might work for you. There is ArrowRoot Starch and Potato Starch. I would try the Arrowroot before the Potato, but either would work I think. They might give a slight difference in the texture, but you can give it a go and see. There is also Sweet Potato Starch (AWESOME as a sauce thickener), but not sure how that would work for Tortillas. Good luck!
Talya DiGirolamo says
Can you freeze these? If so for how long would you say?
Elizabeth says
Yes, they freeze well if wrapped tightly. I’d say you could store them in the freeze for up to four weeks.
Krista says
Can I use Organic butter instead of lard?
Elizabeth says
Yes! Absolutely!
Carissa says
I’m not gluten free, but I’m a VERY picky eater and detest most things gluten free, however, I’m a nanny and chef to very picky 4 and 6 year old gf siblings. I have experimented with a few recipes and made these the first time with coconut oil, since I didn’t have shortening…HUGE FAIL…will NOT work or taste good. Must use shortening or lard.
Today, I followed your recipe using only brown rice flour, and YUM!!!!
Kids loved them and so did I!!! Did I mention I haven’t met a gf food that I liked?? Yup, they are THAT GOOD.
This is a great recipe to accommodate gf and non-gf at a party and everyone would be happy.
Elizabeth says
Ha! Glad you enjoyed them. Sorry they weren’t to your liking with coconut oil. I’m glad you tried them again. They’re one of my favorites!
Leah says
Hello! Can I make the dough ahead of time and put it in the fridge and cook them a few hours later? I’d like my tortillas fresh and warm but I only have time make the dough right now!
Elizabeth says
Yes. That should work. Be sure to wrap the dough very well so that it doesn’t dry out.
Hl says
I can’t wait to try these! If you leave them raw, and place each between wax paper, can they safely be frozen for use later?
Elizabeth says
I wouldn’t freeze the dough raw. Rather, I’d cook them, allow them to cool and then freeze. Thaw on the counter or for a few seconds in the micro when ready to eat. Enjoy!
Michelle says
If you use squares of parchment paper, instead of plastic bag, you can lay them right on the griddle and peel them off the back once they start to cook. I do this with pizza dough on the grill all the time, them you don’t have to fuss with peeling off the plastic.
Marci says
Best gf tortillas EVER.
Francis says
Unfortunately I have allergies to rice and oats, I was wondering if you knew of a substitute for the rice flour? I’m excited to try this recipe but was unsure if buckwheat or millet would work the same. Any suggestions? Thanks so much!
Elizabeth says
For this recipe, I think millet would work great! If the dough seems a little dry, add a splash more water. Sometimes millet absorbs more water than rice flour. Enjoy!
Elisa Baldock says
I’m new to gluten free cooking. When I make regular flour tortillas not gluten free, I use hot water. The hotter the dough, the easier it is to handle. However, for this recipe, I see it calls to add cold water. Would it be bad to use hot water? I wasn’t sure if there was a reason for the cold water. Thanks!
Elizabeth says
You can use warm water. However, I found that cold water made for a slightly better texture. 🙂
Dae Díaz says
Just made them and the taste is awesome! However, mine ended up hard and curved, did not soften enough and only could burned in the bubbles it formed. Any idea what I did wrong? Thanks!
Elizabeth says
It sounds like two things could have happened. The dough might have needed a little extra water or your pan might not have been hot enough. If you make them in a nonstick skillet, they tend not to get as brown. Hope this helps!